
 こんにちは、吉岡(@yoshiokatsuneo)です。
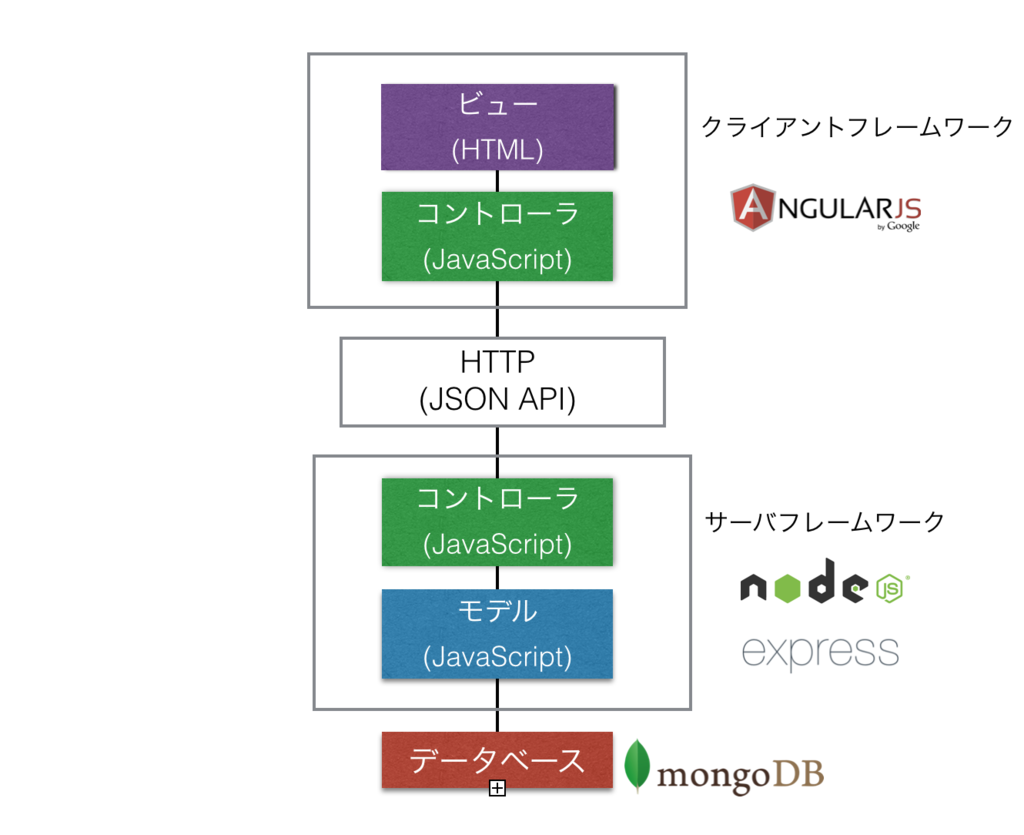
MEANスタック(*)は、JavaScriptのみでフロントエンド、データベース、バックエンドの全てを開発できるWebサービス開発環境です。特にMEANスタックの一つAngularJS Full-Stack generatorでは、ウェブアプリケーション開発のノウハウが詰まっており、先人の知恵を生かすことで、見通しの良いソフトウェアを簡単・迅速に開発できるようになります。
( * ) MEANスタックはMongoDB, Express, AngularJS, Node.jsを組み合わせています。
初回の記事ではMEANスタックの説明とインストールについて、2回目の記事ではTwitter風サービスの作り方について紹介しました。
今回は、具体的なウェブサービスとしてQAサービスを構築してみます。プログラミング関係では、Stack Overflow,teratail,Qiitaのようなサービスが思いつきます。さらに、ブログやFacebookのコメント欄のように、トピックごとに参加者がコメント・議論するような機能は、多くのサービスで参加者同士の交流の場として便利に使われており、QAサービス構築方法の応用範囲も広いです。
2回目のTwitter風サービスでは1画面のみでしたが、今回はジェネレータを使って複数画面を構築したり、バリデーションを使ってみたりしてみます。
今回作るQAサービスでは、以下のような機能を入れてみます。
- 質問一覧表示
- 質問の作成・編集・削除
- 質問に対する回答の作成・編集・削除
- 質問・回答に対するコメントの作成・編集・削除
- 各質問ごとに質問タグを保持
- Markdown形式による編集
- 質問・回答・コメントの検索
- 質問・回答・コメントに対するお気に入り
- 全ての質問一覧・自分の質問一覧・お気に入り質問一覧表示
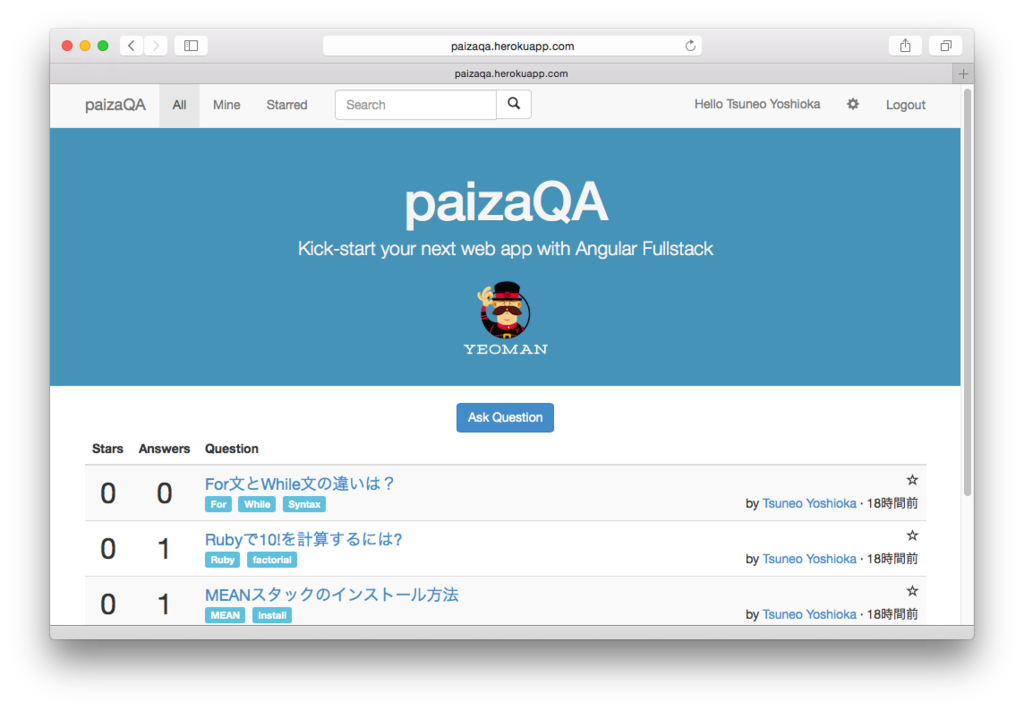

今回作成するQAサービスは、以下URLでも試すことができます。 http://paizaqa.herokuapp.com
ソースコードは以下で取得することができます。 https://github.com/gi-no/paizaqa
それでは、QAサービスを作ってみましょう。
目次
- MEANスタックのインストール
- プロジェクトの作成
- ディレクトリ構成
- サーバ側の質問コンポーネント(モデル、API等)の作成
- クライアント側の質問一覧、作成、表示コンポーネント(コントローラ・HTML等)の作成
- 回答の追加
- Markdown表記の対応
- 質問タグの追加
- ユーザ認証
- 入力の検証
- 時刻表示フィルタ
- コメントの追加
- お気に入りの追加
- 全ての質問、自分の質問、お気に入りの質問の一覧表示
- 検索
- 日本語検索
- 無限スクロール
- SNS認証
- デプロイ
- まとめ
MEANスタックのインストール
まだインストールしていない場合、MEANスタックの1つ、Angular Full-Stack generatorをインストールします。 インストール手順は第一回の手順を参照してください。
インストールしたAngularJS Full-stack generatorのバージョンが3.3.0以降であることを確認します。
$ npm ls -g generator-angular-fullstack
/usr/local/lib
└── generator-angular-fullstack@3.3.0
古い場合、アップデートしてください。
$ sudo npm update -g generator-angular-fullstack
プロジェクトの作成
まず、プロジェクトの雛形を作成します。ここでは、プロジェクト名をpaizaqaとしてみます。雛形作成は、"yo"(Yeoman)で行います。
% mkdir paizaqa
% cd paizaqa
% yo angular-fullstack paizaqa
デフォルト設定ですが、SNS認証(oAuth)を有効にしてみます。
- Would you like to include additional oAuth strategies?
 ◉ Google
 ◉ Facebook
❯◉ Twitter
作成されたプロジェクトを実行してみましょう。
% grunt serve
ブラウザが起動して http://localhost:9000/ を開き、雛形サービスが動作します。

ディレクトリ構成
作成されたプロジェクトのディレクトリ構造は以下のようになります。
.
|-- bower.json                            Bowerパッケージ一覧(クライアント側ライブラリ)
|-- package.json                          npmパッケージ一覧(サーバ側ライブラリ)
|
|-- client                                クライアント側コード
|   |-- app
|   |   |-- app.js                        クライアント側メインJavaScriptコード
|   |   `-- main
|   |       |-- main.controller.js        クライアント側コントローラ実装
|   |       |-- main.controller.spec.js   クライアント側テストコード
|   |       |-- main.html                 HTMLファイル
|   |       |-- main.js                   クライアント側ルーティング設定
|   |       `-- main.scss                 CSSファイル
|   |-- components
|   |   |-- navbar
|   |   |   |-- navbar.controller.js      Navbarコントローラ
|   |   |   `-- navbar.html               NavbarのHTMLファイル
|   |   `-- socket
|   |       `-- socket.service.js         クライアント側WebSocket実装
|   `-- index.html
|
`-- server                                サーバ側コード
    `-- api
        `-- thing
            |-- index.js                  サーバ側APIルーティング設定
            |-- thing.controller.js       サーバ側コントローラ(API実装)
            |-- thing.model.js            サーバ側DBモデル
            |-- thing.socket.js           サーバ側WebSocket実装
            `-- thing.integration.js      サーバ側テストコード
クライアント側のコードはclientに、サーバ側のコードはserverに配置されます。また、機能単位でコンポーネントとしてファイルをディレクトリにまとめることで、各コンポーネントが独立して全体の見通しがよくなっています。
クライアント側では、app/"モジュール名" 配下にURL単位のコンポーネントごとにディレクトリとしてファイルがまとめられます。ディレクトリの主要なファイルは、HTMLファイル(main.html)、クライアント側コントローラ(main.controller.js)で、それ以外にクライアント側ルーティング設定、テストコード、CSSファイルなどが含まれます。共通の機能はcomponents配下のサブディレクトリにまとめられます。
サーバ側では、server/api/"モジュール名"配下にURL単位のコンポーネントとごとにディレクトリにまとめられます。ディレクトリの主要なファイルは、関連のDBモデル、サーバ側コントローラで、その他にサーバ側ルーティング設定、サーバ側WebSocket実装、テストコードが含まれます。
クライアントとサーバはJSONベースのHTTP APIを用いて、クライアント側コントローラとサーバ側コントローラが通信することでデータやイベントの送受信を行います。MVCモデルをあてはめると、サーバ側からはクライアントがビューのように、クライアント側からはサーバがモデルのように見えます。
サーバ側の質問コンポーネント(モデル、API等)の作成
今回のQAサービスでは、各質問ごとにドキュメントをデータベースに作成・保持します。
サーバ側で保持する質問データに関連するファイル(DBモデル、サーバ側APIコントローラなど)及び、それらをまとめたディレクトリをgeneratorで作成します。
endpointが聞かれますので、デフォルト(/api/questions)にします。 server/api/question ディレクトリに、question.controller.js, question.model.jsなどの雛形が作成され、"/api/questions"がAPIとして利用できます。
% yo angular-fullstack:endpoint question
DBモデルを編集して、質問タイトル、質問内容、回答一覧を保持します。MongoDBでは配列や連想配列を含むJSONオブジェクトをまとめて保持できます。MongoDB自体はスキーマ定義はありませんが、Angular Full-Stack generatorで利用しているmongooseではMongoDB上でスキーマ機能を利用して保存するフィールドを限定したりデータを検証したりできまるので、質問回答関連の情報をスキーマとして定義します。
server/api/question/question.model.js
var QuestionSchema = new mongoose.Schema({
  title: String,
  content: String,
});
テストコードもモデルの変更にあわせておきます。すべての"name", "info"をそれぞれ"title", "content"に置換すればいいです。(5箇所)
server/api/question/question.integration.js
// name: ...
title: ...
// info: ...
content: ...
...
// newQuestion.name....
newQuestion.title....
// question.info....
newQuestion.content....
...
// question.name....
question.title....
// question.info....
question.content....
...
// name: ...
title: ...
// info: ...
content: ...
...
// updatedQuestion.name....
updatedQuestion.title....
// question.info....
updatedQuestion.content....
クライアント側の質問一覧、作成、表示コンポーネント(コントローラ・HTML等)の作成
次に、質問一覧表示、質問作成、質問表示を行うためのファイル(コントローラ・HTML等)を作成します。


不要なファイルの削除
まず、不要な雛形を削除します。
% rm -r client/app/main
雛形作成
そして、質問関連のファイル、及びそれらをまとめたディレクトリgeneratorで作成します。ここでは質問一覧表示、質問作成、質問表示に対応した3つのディレクトリ(questionsIndex, questionsCreate, questionsShow)を作成します。
generatorがルーティングを聞いてきますので、「What will the url of your route be?」で、以下のように設定します。
| コントローラ | ルーティングURL |
|---|---|
| questionsIndex(質問一覧) | / |
| questionsCreate(質問作成) | /questions/create |
| questionsShow(質問表示) | /questions/show/:id |
% yo angular-fullstack:route questionsIndex
? Where would you like to create this route? client/app/
? What will the url of your route be? /
% yo angular-fullstack:route questionsCreate
? Where would you like to create this route? client/app/
? What will the url of your route be? /questions/create
% yo angular-fullstack:route questionsShow
? Where would you like to create this route? client/app/
? What will the url of your route be? /questions/show/:id
生成された雛形を元に、クライアント側の各コントローラ/HTMLファイルの実装を行います。
質問一覧表示ルーティングの変更
質問一覧ページがメインページになるように、質問一覧ページのstateを"main"に変更します。
client/app/questionsIndex/questionsIndex.js:
.state('main', {
質問一覧表示コントローラの変更
質問一覧表示コントローラでは、"GET /api/questions" APIを呼び出して質問一覧を取得します。取得した質問一覧はHTMLで参照できるように$scopeに保持します。$httpサービスを利用するので、コントローラ関数の引数に$httpを追加します。引数の名前に応じたサービスが自動的に引数に割り当てられます。
client/app/questionsIndex/questionsIndex.controller.js
  .controller('QuestionsIndexCtrl', function ($scope, $http) {
    $http.get('/api/questions').success(function(questions) {
      $scope.questions = questions;
    });
  });
質問一覧表示HTMLファイルの変更
質問一覧表示HTMLファイルでは、$scope.questionsをquestionsとして参照します。'ng-repeat="question in questions"'のように属性を記述することで、すべての質問についてタグの内容を繰り返して表示できます。また{{question.title}}のように指定することでスコープ変数を参照できます。
client/app/questionIndex/questionIndex.html
<header class="hero-unit" id="banner">
  <div class="container">
    <h1>paizaQA</h1>
    <p class="lead">Kick-start your next web app with Angular Fullstack</p>
    <img src="assets/images/yeoman.png" alt="I'm Yeoman">
  </div>
</header>

<div class="container">
  <br/>
  <div style="text-align: center">
    <a type="button" class="btn btn-primary" href="/questions/create">Ask Question</a>
  </div>

  <table class="table table-striped">
    <thead>
      <tr>
        <th>Question</th>
      </tr>
    </thead>
    <tbody>
      <tr ng-repeat="question in questions">
        <td>
          <a ng-href="/questions/show/{{question._id}}" style="font-size: large">{{question.title}}</a>
        </td>
      </tr>
    </tbody>
  </table>
</div>
client/app/questionIndex/questionIndex.scss
#banner {
    border-bottom: none;
    margin-top: -20px;
}

#banner h1 {
    font-size: 60px;
    line-height: 1;
    letter-spacing: -1px;
}

.hero-unit {
    position: relative;
    padding: 30px 15px;
    color: #F5F5F5;
    text-align: center;
    text-shadow: 0 1px 0 rgba(0, 0, 0, 0.1);
    background: #4393B9;
}
質問作成コントローラの変更
質問投稿時に呼び出される関数$scope.submit()を実装します。投稿された質問($scope.question)を"POST /api/questions"APIを通じてサーバにを渡して保存します。投稿後は、$location.path('/questions')で質問一覧画面に移動します。
client/app/questionsCreate/questionsCreate.controller.js
...
  .controller('QuestionsCreateCtrl', function ($scope, $http, $location) {
    $scope.submit = function() {
      $http.post('/api/questions', $scope.question).success(function(){
        $location.path('/');
      });
    };
  });
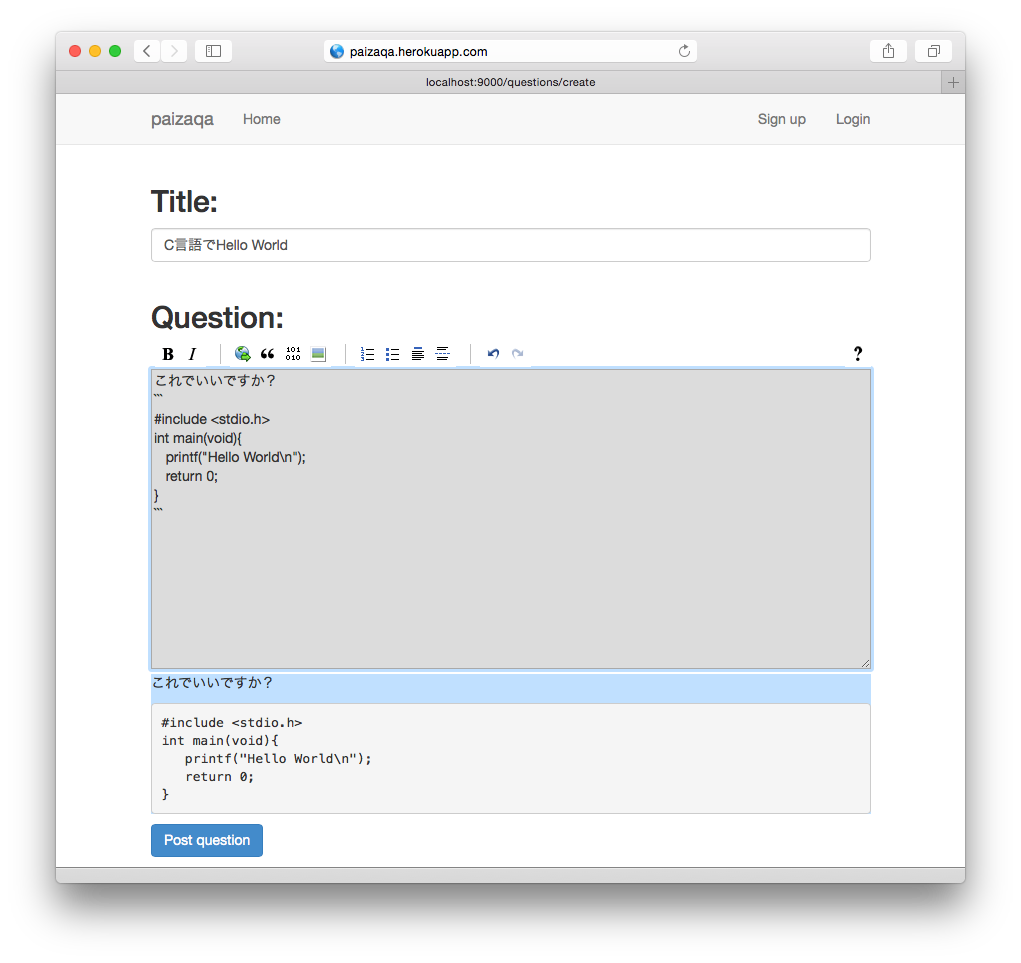
質問作成HTMLファイルの変更
質問作成HTMLファイルでは、投稿時にsubmit()関数を呼び出すようにng-submit属性を追加します。inputタグでng-model="question.title"のように属性を指定することで、スコープ変数のquestion.titleが入力内容と自動的に(双方向に)同期するようになります。
client/app/questionsCreate/questionsCreate.html
<div class="container">
  <form name="form" ng-submit="submit()">
    <h2>Title:</h2>
    <input type="text" class="form-control" ng-model="question.title">
    <br>
    <h2>Question:</h2>
    <textarea rows=10 cols=80 ng-model="question.content"></textarea>
    <input type="submit" class="btn btn-primary" value="Post question">
  </form>
</div>
質問表示コントローラの変更
質問表示コントローラでは、質問の内容を取得して表示します。質問IDは指定したURL(/questions/show/:id)の":id"部分を$stateParams.idとして参照します。
client/app/questionsShow/questionsShow.controller.js
  .controller('QuestionsShowCtrl', function ($scope, $http, $stateParams) {
    var loadQuestions = function(){
      $http.get('/api/questions/' + $stateParams.id).success(function(question) {
        $scope.question = question;
      });
    };
    loadQuestions();
  });
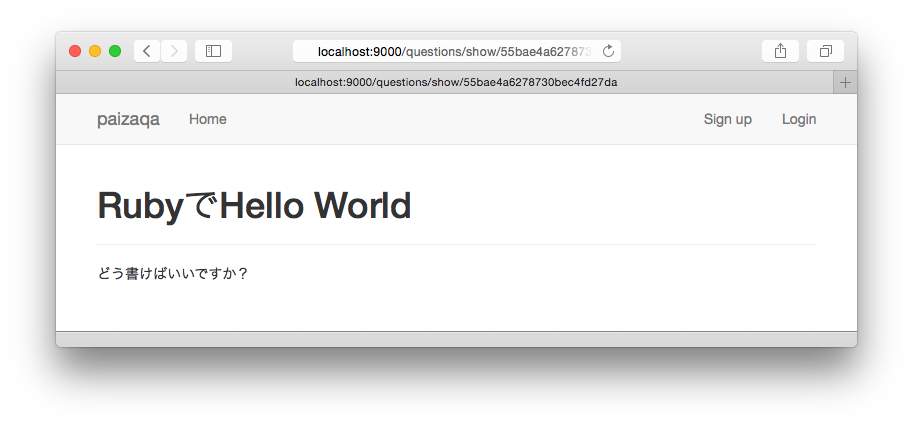
質問表示HTMLファイルの変更
質問表示HTMLファイルでは質問のタイトルと中身を表示します。 コントローラで設定した$scope.questionをquestionとして参照します。
client/app/questionsShow/questionsShow.html
<div class="container" id="question-show-container">
  <div>
    <div>
      <h1>{{question.title}}</h1>
    </div>
  </div>
  <hr/>
  {{question.content}}
</div>
client/app/questionsShow/questionsShow.scss
#question-show-container .comment{
  hr {
    margin: 0;
  };
  p {
    margin: 0;
  };
  margin-left: 100px;
};
サービスの再起動
通常は編集後の再起動は必要なくリアルタイムで変更が反映されますが、構成をかなり変更したので 変更点が読み込まれるように、念のためgruntを再起動して動作を確認します。
% grunt serve
回答の追加
現状、質問のタイトルと内容しか保持していないので、QAサービスなのに質問しかできないサービスになっています。回答を作成・表示できるようにします。
サーバ側DBモデルの変更
回答を保持するように質問スキーマを変更します。MongoDBでは1つのドキュメント(RDBのレコードに対応)中に配列を含むJSONオブジェクトを保持できます。ここでは質問スキーマで回答一覧を配列として保持するようにします。
server/api/question/question.model.js
var QuestionSchema = new mongoose.Schema({
  title: String,
  content: String,
  answers: [{
    content: String,
  }],
});
サーバ側ルーティングの変更
回答投稿用のAPIのURLルーティングを追加します。
server/api/question/index.js
router.post('/:id/answers', controller.createAnswer);
サーバ側コントローラの変更
回答投稿用のAPIの実装を行います。MongoDBの'$push'オペレータを使うことで、配列に値を追加することができます。
server/api/question/question.controller.js
function createAnswer(req, res) {
  Question.update({_id: req.params.id}, {$push: {answers: req.body}}, function(err, num) {
    if(err) { return handleError(res)(err); }
    if(num === 0) { return res.send(404).end(); }
    exports.show(req, res);
  });
}
クライアント側質問表示コントローラの変更
回答投稿時に呼び出される$scope.submitAnswer()関数を追加します。"POST /api/questions/質問ID/answers" APIを通じて回答をサーバに渡します。投稿後は再度質問全体を取得して表示しなおします。
client/app/questionsShow/questionsShow.controller.js
    ...
    loadQuestions();
    $scope.newAnswer = {};
    $scope.submitAnswer = function() {
      $http.post('/api/questions/' + $stateParams.id + '/answers', $scope.newAnswer).success(function(){
        loadQuestions();
        $scope.newAnswer = {};
      });
    };
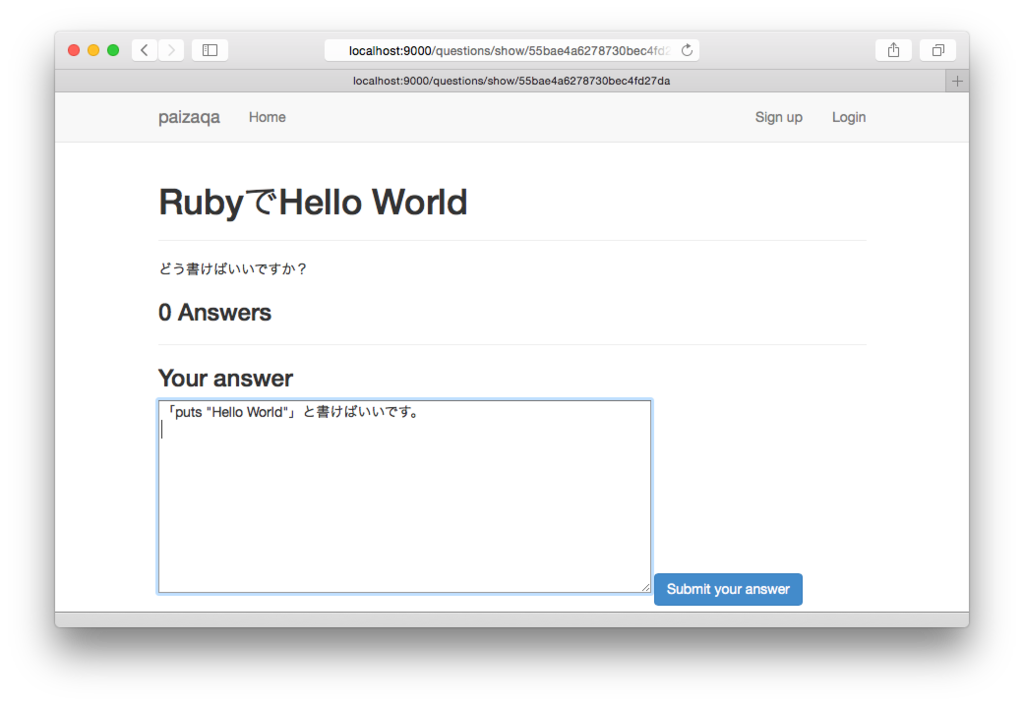
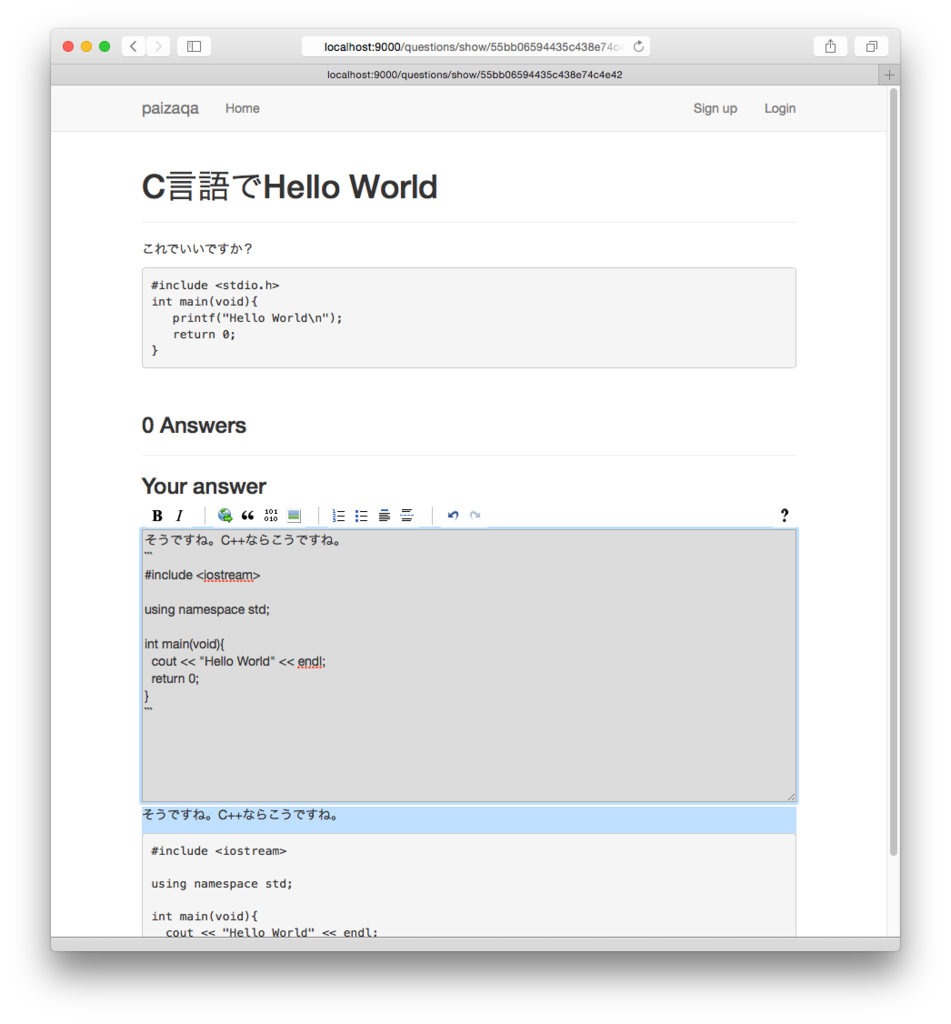
クライアント側質問表示HTMLファイルの変更
質問オブジェクトに保存されている回答一覧オブジェクトを表示します。また、新規回答を投稿した場合はコントローラの$scope.submitAnswerを呼び出すように、ng-submit属性で指定します。
client/app/questionsShow/questionsShow.html
  ...
  {{question.content}}

  <h3>{{question.answers.length}} Answers</h3>
  <div ng-repeat="answer in question.answers">
    <hr/>
    <div class="answer">
      {{answer.content}}
    </div>
  </div>
  <hr/>
  <h3>Your answer</h3>
  <form name="answerForm" ng-submit="submitAnswer()">
    <textarea rows=10 cols=80 ng-model="newAnswer.content"></textarea>
    <input type="submit" class="btn btn-primary" value="Submit your answer">
  </form>
</div>
client/app/questionsShow/questionsShow.css
...
#question-show-container .answer{
  margin-left: 50px;
};
Markdown表記の対応
現状、単純なテキストのみが投稿・表示できるようになっていますが、Stack Overflowなどで使われているMarkdown形式に対応してみます。モジュールを追加してタグを書き換えるだけで簡単に対応できます。
モジュールのインストール
Markdownに対応するために、angular-pagedownモジュールをインストールします。AngularJSのバージョンを聞かれたら最新版になるようにしておきます。
% bower install angular-pagedown --save
...
Unable to find a suitable version for angular, please choose one:
    1) angular#~1.2 which resolved to 1.2.28 and is required by angular-pagedown#0.4.3
    2) angular#>=1.2.* which resolved to 1.4.3 and is required by paizaqa
    3) angular#>= 1.0.8 which resolved to 1.4.3 and is required by angular-ui-router#0.2.15
    4) angular#>=1 which resolved to 1.4.3 and is required by angular-bootstrap#0.11.2
    5) angular#^1.2.6 which resolved to 1.4.3 and is required by angular-socket-io#0.6.1
    6) angular#1.4.3 which resolved to 1.4.3 and is required by angular-resource#1.4.3

Prefix the choice with ! to persist it to bower.json

? Answer: 2
必要な依存ファイルも読み込まれるようにbower.jsonに追加します。
bower.json
{
  ...
  },
  "overrides": {
    "pagedown": {
      "main": [
        "Markdown.Converter.js",
        "Markdown.Sanitizer.js",
        "Markdown.Extra.js",
        "Markdown.Editor.js",
        "wmd-buttons.png"
      ]
    }
  }
}
アプリケーションの依存モジュール追加
モジュールが利用できるように、アプリケーションの依存モジュールに"ui.pagedown"を追加します。
client/app/app.js
angular.module('paizaqaApp', [
  ... ,
  'ui.pagedown',
])
pagedownタグの利用
入力欄でMarkdown入力できるようにします。textareaタグをpagedown-editorタグに書き換えて、content属性で編集する変数を指定します。表示については"{{}}"で表示していた部分をpagedown-viewerタグに書き換えます。
client/app/questionsCreate/questionsCreate.html
<!-- <textarea ... ng-model="question.content">...</textarea> -->
<pagedown-editor ng-model="question.content"></pagedown-editor>
client/app/questionsShow/questionsShow.html
<!-- {{question.content}} -->
<pagedown-viewer content="question.content"></pagedown-viewer>
...
<!-- {{answer.content}} -->
<pagedown-viewer content="answer.content"></pagedown-viewer>
...
<!-- <textarea ... ng-model="newAnswer.content"></textarea> -->
<pagedown-editor ng-model="newAnswer.content"></pagedown-editor>
質問タグの追加
質問の種類がわかりやすくなるように、質問の種類を表すタグ("Android", "Objective-C"など)を質問に設定できるようにしてみます。

DBモデルの変更
質問タグ一覧を配列として保持するように質問スキーマを変更します。
server/api/question/question.model.js
var QuestionSchema = new mongoose.Schema({
  title: String,
  content: String,
  answers: [{
    content: String,
  }],
  tags: [{
    text: String,
  }],
});
タグ編集モジュールの追加
タグをわかりやすく編集・表示するためのライブラリngTagsInputをインストールします。
% bower install ng-tags-input --save
アプリケーションの依存モジュールの追加
ngTagsInputモジュールを利用できるように依存モジュールに追加します。
client/app/app.js
angular.module('paizaqaApp', [
  ...
  'ngTagsInput',
])
質問作成HTMLファイルの変更
tags-inputタグを利用して、質問タグの入力欄を追加します。なお、tags-inputの中のauto-complete要素でタグ名の補完を行うこともできますが今回は省略します。
client/questionsCreate/questionsCreate.html
    <pagedown-editor ng-model="question.content"></pagedown-editor>
    <h2>Tags:</h2>
    <tags-input ng-model="question.tags">
      <!-- <auto-complete source="loadTags($query)"></auto-complete> -->
    </tags-input>
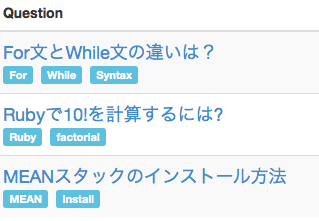
質問一覧HTMLファイルの変更
質問一覧HTMLファイルで質問タイトルの下にタグを表示します。
client/app/questionsIndex/questionsIndex.html
<a ng-href="/questions/show/{{question._id}}" style="font-size: large">{{question.title}}</a> <div> <span ng-repeat="tag in question.tags"> <span class="label label-info"> {{tag.text}} </span> </span> </div>
質問表示HTMLファイルの変更
質問表示HTMLファイルでもタグを表示します。
client/app/questionsShow/questionsShow.html
      <h1>{{question.title}}</h1>
      <span ng-repeat="tag in question.tags">
        <span class="label label-info">
          {{tag.text}}
        </span>
      </span>
ユーザ認証
今までのところ、誰が投稿・回答したのかわからないので、ユーザ認証機能をつけます。また投稿を作成したユーザのみ、投稿の削除・編集ができるようにします。ついでに、投稿・回答日時も保持するようにしておきます。

サーバ側DBモデルの変更
ユーザIDを各質問、回答で保持するようにします。"ref: 'User'"として対応するスキーマを指定することで、pupulate()関数を通じてユーザIDからユーザオブジェクトに展開できるようになります。
populate()は明示的に呼び出すこともできますが、クエリに対しては常に展開するように、pre()でfind(), findOne()関数をフックして、ハンドラからpopulate()を呼び出します。 populate('user')でUserオブジェクトの全てのフィールドが展開されますが、必要なフィールド('name')のみ展開するように、populate('user','name')と記述します。
server/api/question/question.model.js
var QuestionSchema = new mongoose.Schema({
  title: String,
  content: String,
  answers: [{
    content: String,
    user: {
      type: mongoose.Schema.ObjectId,
      ref: 'User'
    },
    createdAt: {
      type: Date,
      default: Date.now,
    },
  }],
  tags: [{
    text: String,
  }],
  user: {
    type: mongoose.Schema.ObjectId,
    ref: 'User'
  },
  createdAt: {
    type: Date,
    default: Date.now
  },
});
QuestionSchema.pre('find', function(next){
  this.populate('user', 'name');
  this.populate('answers.user', 'name');
  next();
});
QuestionSchema.pre('findOne', function(next){
  this.populate('user', 'name');
  this.populate('answers.user', 'name');
  next();
});
サーバ側APIルーティングの変更
サーバ側APIルーティング設定で、認証が必要なURLリソースについてはauth.isAuthenticated()をExpressのミドルウェアとして追加します。これより、サーバ側コントローラではreq.userとして現在のログインユーザを取得できます。 また、回答削除用のAPI(DELETE /:id/answers/:answerId)も追加しておきます。
server/api/question/index.js
var auth = require('../../auth/auth.service');

router.get('/', controller.index);
router.get('/:id', controller.show);
router.post('/', auth.isAuthenticated(), controller.create);
router.put('/:id', auth.isAuthenticated(), controller.update);
router.patch('/:id', auth.isAuthenticated(), controller.update);
router.delete('/:id', auth.isAuthenticated(), controller.destroy);

router.post('/:id/answers', auth.isAuthenticated(), controller.createAnswer);
router.put('/:id/answers/:answerId', auth.isAuthenticated(), controller.updateAnswer);
router.delete('/:id/answers/:answerId', auth.isAuthenticated(), controller.destroyAnswer);
サーバ側コントローラの変更
投稿日時の逆順で最後の20件のみ返すように変更します。sort({createdAt: -1})により、createdAtフィールドの逆順で表示します。limit(20)で最新の20件に制限します。クエリが構築できたら、execAsync()で実行します。
server/api/question/question.controller.js
export function index(req, res) {
  Question.find().sort({createdAt: -1}).limit(20).execAsync()
    ...
質問作成APIでは、質問ユーザを質問の一部として保存します。質問ユーザは、req.userで参照します。
server/api/question/question.controller.js
export function create(req, res) {
  req.body.user = req.user;
  Question.create(req.body, ...
...
export function createAnswer(req, res) {
  req.body.user = req.user;
  Question.update(...
質問更新・削除APIでは、現在のユーザIDが質問のユーザIDに一致するか確認することで、投稿ユーザのみ更新・削除できるようにします。
server/api/question/question.controller.js
function handleUnauthorized(req, res) {
  return function(entity) {
    if (!entity) {return null;}
    if(entity.user._id.toString() !== req.user._id.toString()){
      res.send(403).end();
      return null;
    }
    return entity;
  }
}
...
// Updates an existing Question in the DB
export function update(req, res) {
  ...
    .then(handleEntityNotFound(res))
    .then(handleUnauthorized(req, res))
    ...
...
// Deletes a Question from the DB
export function destroy(req, res) {
  ...
    .then(handleEntityNotFound(res))
    .then(handleUnauthorized(req, res))
    ...
回答削除APIも実装しておきます。MongoDBの'$pull'オペレータを使うことで、回答一覧配列から指定した回答ID、回答ユーザの回答を削除します。
export function destroyAnswer(req, res) {
  Question.update({_id: req.params.id}, {$pull: {answers: {_id: req.params.answerId , 'user': req.user._id}}}, function(err, num) {
    if(err) { return handleError(res)(err); }
    if(num === 0) { return res.send(404).end(); }
    exports.show(req, res);
  });
};
回答更新APIも実装します。クエリ中の'$'で条件に一致する配列(この場合、回答配列)のインデックスを取得できます。ログインユーザと一致する回答のみ更新できるようにユーザIDが回答ユーザと一致することも条件にします。
export function updateAnswer(req, res) {
  Question.update({_id: req.params.id, 'answers._id': req.params.answerId}, {'answers.$.content': req.body.content, 'answers.$.user': req.user.id}, function(err, num){
    if(err) { return handleError(res)(err); }
    if(num === 0) { return res.send(404).end(); }
    exports.show(req, res);
  });
};
クライアント側質問一覧表示HTMLの変更
質問のユーザ名、作成日時を追加します。
client/app/questionsIndex/questionsIndex.html
          <a ng-href="/questions/show/{{question._id}}" style="font-size: large">{{question.title}}</a>
          <div class="clearfix"></div>
          <div style="float: right;">
            by {{question.user.name}}
             · {{question.createdAt}}
          </div>
クライアント側質問表示コントローラの変更
質問・回答の削除関数(deleteQuestion(), deleteAnswer())を実装します。それぞれ"DELETE /api/questions/:id" API、"DELETE /api/questions/:id/answers/:id"を呼び出します。質問・回答の更新関数は"PUT /api/questions/:id" API、"PUT /api/questions/:id/answers/:id"を呼び出します。
また、質問・回答ユーザが、ログインユーザと一致しているか確認するisOwner()関数も実装します。ログインしているかはAuth.isLoggedIn()で、ログインユーザは、Auth.getCurrentUser()._idで取得できます。$location, Authモジュールを利用するので、コントローラ関数の引数に$location, Authを追加します。AngularJSではコントローラの引数には、引数の名前に対応するサービスが自動的に割り当てられます。
client/app/questionsShow/questionsShow.controller.js
angular.module('paizaqaApp')
  .controller('QuestionsShowCtrl', function ($scope, $http, $stateParams, Auth, $location) {
    ...
    $scope.deleteQuestion = function() {
      $http.delete('/api/questions/' + $stateParams.id).success(function(){
        $location.path('/');
      });
    };
    $scope.deleteAnswer = function(answer) {
      $http.delete('/api/questions/' + $stateParams.id + '/answers/' + answer._id).success(function(){
        loadQuestions();
      });
    };
    $scope.updateQuestion = function() {
      $http.put('/api/questions/' + $stateParams.id, $scope.question).success(function(){
        loadQuestions();
      });
    };
    $scope.updateAnswer = function(answer) {
      $http.put('/api/questions/' + $stateParams.id + '/answers/' + answer._id, answer).success(function(){
        loadQuestions();
      });
    };
    $scope.isOwner = function(obj){
      return Auth.isLoggedIn() && obj && obj.user && obj.user._id === Auth.getCurrentUser()._id;
    };
クライアント側質問表示HTMLの変更
こちらも、質問と各回答のユーザ名・作成日時を追加します。
client/app/questionsShow/questionsShow.html
  <pagedown-viewer content="question.content"></pagedown-viewer>
  <div class="text-right">by {{question.user.name}} · {{question.createdAt}}</div>
...
    <pagedown-viewer content="answer.content"></pagedown-viewer>
    <div class="text-right">by {{answer.user.name}} · {{answer.createdAt}}</div>
また、質問・回答と同じユーザの場合には削除ボタンも追加します。コントローラで実装したisOwner()関数でユーザが一致するか確認し、クリックされた場合はdeleteQuestion()/deleteAnswer()関数を呼び出すように、ng-click属性で指定します。
client/app/questionsShow/questionsShow.html
<button ng-if="isOwner(question)" type="button" class="close" ng-click="deleteQuestion()">×</button> <div> <h1>{{question.title}}</h1> ... <button ng-if="isOwner(answer)" type="button" class="close" ng-click="deleteAnswer(answer)">×</button> <pagedown-viewer content="answer.content"></pagedown-viewer>
編集ボタンも追加します。編集中はeditting変数がtrueになります。ng-show/ng-ifを用いて、edittingの状態に応じて表示する要素を切り替えます。同じedittingという名前を質問・回答で使っていますが、回答はng-repeat配下にあり、ng-repeat配下では別の変数スコープになるので別の変数を参照することになります。
client/app/questionsShow/questionsShow.html
      <h1>
        <div ng-if="! editting">{{question.title}}</div>
        <input type=text ng-model="question.title" ng-if=" editting">
      </h1>
      ...
  <pagedown-viewer content="question.content" ng-if="!editting"></pagedown-viewer>
  <pagedown-editor ng-model="question.content" ng-if=" editting"></pagedown-editor>
  <button type="submit" class="btn btn-primary" ng-click="editting=false;updateQuestion()" ng-show=" editting">Save</button>
  <a ng-click="editting=!editting;" ng-show="isOwner(question) && !editting">Edit</a>
  ...
    <div class="answer">
      ...
      <pagedown-viewer content="answer.content" ng-if="!editting"></pagedown-viewer>
      <pagedown-editor ng-model="answer.content" ng-if=" editting"></pagedown-editor>
      <button type="submit" class="btn btn-primary" ng-click="editting=false;updateAnswer(answer)" ng-show=" editting">Save</button>
      <a ng-click="editting=!editting;" ng-show="isOwner(answer) && !editting">Edit</a>
      ...
クライアント側質問作成コントローラ変更
認証済みでない場合、ログイン画面に移動します。
client/app/questionsCreate/questionsCreate.controller.js
  .controller('QuestionsCreateCtrl', function ($scope, $http, $location, Auth) {
    if(! Auth.isLoggedIn()){
      $location.path('/login');
      return;
    }
    ...
◆サーバ側テストの変更
ルーティングのテストは今回は削除しておきます。
% rm server/api/question/index.spec.js
また、認証が必要なAPIについては、"server/api/user/user.integration.js"を参考に、テスト前時にログインして認証情報を設定します。
server/api/question/question.integration.js
var User = require('../user/user.model');
...
describe('Question API:', function() {
  var user;
  before(function() {
    return User.removeAsync().then(function() {
      user = new User({
        name: 'Fake User',
        email: 'test@test.com',
        password: 'password'
      });

      return user.saveAsync();
    });
  });

  var token;
  before(function(done) {
    request(app)
      .post('/auth/local')
      .send({
        email: 'test@test.com',
        password: 'password'
      })
      .expect(200)
      .expect('Content-Type', /json/)
      .end(function(err, res) {
        token = res.body.token;
        done();
      });
  });
  ...
  describe('POST /api/questions', function() {
    ...
        .post('/api/questions')
        .set('authorization', 'Bearer ' + token)
    ...
  describe('PUT /api/questions/:id', function() {
    ...
        .put('/api/questions/' + newQuestion._id)
        .set('authorization', 'Bearer ' + token)
    ...
  describe('DELETE /api/questions/:id', function() {
    ...
        .delete('/api/questions/' + newQuestion._id)
        .set('authorization', 'Bearer ' + token)
    ...
        .delete('/api/questions/' + newQuestion._id)
        .set('authorization', 'Bearer ' + token)
    ...
  /* describe('PUT /api/things/:id', function() {
  }); */
入力の検証
現状、質問のタイトル、本文、回答に何も入力しなくても投稿できてしまいます。入力がないと投稿できないようにしてみましょう。

モジュールのインストール
入力検証で利用するngMessagesモジュールをインストールします。
% bower install angular-messages --save
アプリケーション依存モジュールで、ngMessagesを追加
入力検証に使う、ngMessages(AngularJSモジュール)をアプリケーションの依存モジュールに追加して、アプリケーションから利用できるようにします。
client/app/app.js
angular.module('paizaqaApp', [
  ...
  'ngMessages',
])
クライアント側HTMLファイルで、各入力フィールドに検証を追加
入力フォームの各入力フィールドで検証条件(requiredなど)を指定します。また、検証結果を参照できるように、入力フォームに名前(name)を、入力フィールドに名前(name)とモデル(ng-model)を指定します。"フォーム名.フィールド名.$error"に各フィールドの検証結果が保持されますので、ng-messages/ng-messageで検証結果を表示できます。また全体の検証結果は"フォーム名.$invalid"で保持されますので、検証失敗中は送信できないようにします。
client/app/questionsCreate/questionsCreate.html
  <form name="form" ng-submit="submit()">
    <h2>Title:</h2>
    <input type="text" class="form-control" ng-model="question.title" name="question_title" required>
    <span class="text-danger" ng-messages="form.question_title.$error">
      <span ng-message="required">Required</span>
    </span>
    <span class="text-success" ng-show="form.question_title.$valid">OK</span>
    <br>
    <h2>Question:</h2>
    <pagedown-editor ng-model="question.content" name="question_content" required></pagedown-editor>
    <span class="text-danger" ng-messages="form.question_content.$error">
      <span ng-message="required">Required</span>
    </span>
    <span class="text-success" ng-show="form.question_content.$valid">OK</span>
    <h2>Tags:</h2>
    <tags-input ng-model="question.tags">
      <!-- <auto-complete source="loadTags($query)"></auto-complete> -->
    </tags-input>
    <input type="submit" class="btn btn-primary" ng-disabled="form.$invalid" value="Post question">
  </form>
client/app/questionsCreate/questionsShow.html
    <pagedown-editor ng-model="newAnswer.content" name="answerEditor" required></pagedown-editor>
    <input type="submit" class="btn btn-primary" ng-disabled="answerForm.$invalid" value="Submit your answer">
時刻表示フィルタ
時刻表示がUTC表示ですが、フィルタを作って現在からの時間で表示するようにしてみます。

Moment.jsのインストール
時刻表示用のライブラリMoment.jsをインストールします。
% bower install --save momentjs
日本語など、他言語対応できるようにライブラリを追加します。(英語のみなら不要)
client/index.html
    <!-- build:js({client,node_modules}) app/vendor.js -->
      <!-- bower:js -->
      ...
      <!-- endbower -->
      <script src="bower_components/momentjs/min/moment-with-locales.min.js"></script>
      <script src="socket.io-client/socket.io.js"></script>
    <!-- endbuild -->
フィルタの作成
フィルタの雛形を作成します。
% yo angular-fullstack:filter fromNow
% grunt injector
フィルタの実装
Moment.jsのfromNow()関数で時刻表示形式を変換します。locale()関数で言語を設定することもできます(英語のみなら不要)。
client/app/fromNow/fromNow.filter.js
    return function (input) {
      return moment(input).locale(window.navigator.language).fromNow();
    };
フィルタを使う
作成したフィルタを使って、時刻表示形式を現在からの時間になるようにします。フィルタを利用する場合、"{{式}}"の部分を"{{式|フィルタ名}}とします。ここでは、{{式}}を{{式|fromNow}}に書き換えます。
client/app/questionsIndex/questionsIndex.html
<!-- Old: {{question.createdAt}} -->
{{question.createdAt|fromNow}}
client/app/questionsCreate/questionsShow.html
<!-- Old: {{question.createdAt}} -->
{{question.createdAt|fromNow}}
<!-- Old: {{answer.createdAt}} -->
{{answer.createdAt|fromNow}}
テストコードの変更
テストが失敗していますので修正しておきます。 テストコードで現在時刻(Date.now())に対して、fromNowフィルタが'a few seconds ago'を返すことを確認します。
client/app/fromNow/fromNow.filter.spec.js
  it('return "a few seconds ago" for now', function () {
    expect(fromNow(Date.now())).toBe('a few seconds ago');
  });
コメントの追加
質問及び回答に対して、コメントを追加できるようにしてみます。
サーバ側DBモデルの変更
質問スキーマで、質問、回答それぞれの配下にコメントを配列として保持します。各コメントでは、質問や回答と同様に作成時刻(createdAt)・投稿ユーザ(user)も保持しておきます。
server/api/question/question.model.js
var QuestionSchema = new mongoose.Schema({
  ...
  answers: [{
    ...
    comments: [{
      content: String,
      user: {
        type: mongoose.Schema.ObjectId,
        ref: 'User'
      },
      createdAt: {
        type: Date,
        default: Date.now,
      }
    }],
  }],
  ...
  comments: [{
    content: String,
    user: {
      type: mongoose.Schema.ObjectId,
      ref: 'User'
    },
    createdAt: {
      type: Date,
      default: Date.now,
    }
  }],
});

QuestionSchema.pre('find', function(next){
  this.populate('user', 'name');
  this.populate('comments.user', 'name');
  this.populate('answers.user', 'name');
  this.populate('answers.comments.user', 'name');
  next();
});
QuestionSchema.pre('findOne', function(next){
  this.populate('user', 'name');
  this.populate('comments.user', 'name');
  this.populate('answers.user', 'name');
  this.populate('answers.comments.user', 'name');
  next();
});
サーバ側ルーティングの変更
質問コメント、回答コメントの追加・削除・更新に以下のようなAPIを追加します。
| メソッド | URL | 動作 |
|---|---|---|
| POST | /:id/comments | 質問コメント追加 |
| PUT | /:id/comments/:commentId | 質問コメント更新 |
| DELETE | /:id/comments/:commentId | 質問コメント削除 |
| POST | /:id/answers/:answerId/comments | 回答コメント追加 |
| PUT | /:id/answers/:answerId/comments/:commentId | 回答コメント更新 |
| DELETE | /:id/answers/:answerId/comments/:commentId | 回答コメント削除 |
server/api/question/index.js
router.post('/:id/comments', auth.isAuthenticated(), controller.createComment);
router.put('/:id/comments/:commentId', auth.isAuthenticated(), controller.updateComment);
router.delete('/:id/comments/:commentId', auth.isAuthenticated(), controller.destroyComment);

router.post('/:id/answers/:answerId/comments', auth.isAuthenticated(), controller.createAnswerComment);
router.put('/:id/answers/:answerId/comments/:commentId', auth.isAuthenticated(), controller.updateAnswerComment);
router.delete('/:id/answers/:answerId/comments/:commentId', auth.isAuthenticated(), controller.destroyAnswerComment);
サーバ側コントローラの変更
コメントの投稿・削除用・更新のAPIを実装します。投稿ではコメント配列に'$push'オペレータで追加し、削除ではコメント入れtから'$pull'オペレータで削除します。更新時は配列の条件一致インデックスを'$'で参照します。回答コメントの更新では、配列の配列については、インデックスを指定する'$'を複数使えませんので配列を1つずつ走査します。
server/api/question/question.controller.js
/* comments APIs */
export function createComment(req, res) {
  req.body.user = req.user.id;
  Question.update({_id: req.params.id}, {$push: {comments: req.body}}, function(err, num){
    if(err) {return handleError(res)(err); }
    if(num === 0) { return res.send(404).end(); }
    exports.show(req, res);
  })
}
export function destroyComment(req, res) {
  Question.update({_id: req.params.id}, {$pull: {comments: {_id: req.params.commentId , 'user': req.user._id}}}, function(err, num) {
    if(err) { return handleError(res)(err); }
    if(num === 0) { return res.send(404).end(); }
    exports.show(req, res);
  });
}
export function updateComment(req, res) {
  Question.update({_id: req.params.id, 'comments._id': req.params.commentId}, {'comments.$.content': req.body.content, 'comments.$.user': req.user.id}, function(err, num){
    if(err) { return handleError(res)(err); }
    if(num === 0) { return res.send(404).end(); }
    exports.show(req, res);
  });
}

/* answersComments APIs */
export function createAnswerComment(req, res) {
  req.body.user = req.user.id;
  Question.update({_id: req.params.id, 'answers._id': req.params.answerId}, {$push: {'answers.$.comments': req.body}}, function(err, num){
    if(err) {return handleError(res)(err); }
    if(num === 0) { return res.send(404).end(); }
    exports.show(req, res);
  })
}
export function destroyAnswerComment(req, res) {
  Question.update({_id: req.params.id, 'answers._id': req.params.answerId}, {$pull: {'answers.$.comments': {_id: req.params.commentId , 'user': req.user._id}}}, function(err, num) {
    if(err) { return handleError(res)(err); }
    if(num === 0) { return res.send(404).end(); }
    exports.show(req, res);
  });
}
export function updateAnswerComment(req, res) {
  Question.find({_id: req.params.id}).exec(function(err, questions){
    if(err) { return handleError(res)(err); }
    if(questions.length === 0) { return res.send(404).end(); }
    var question = questions[0];
    var found = false;
    for(var i=0; i < question.answers.length; i++){
      if(question.answers[i]._id.toString() === req.params.answerId){
        found = true;
        var conditions = {};
        conditions._id = req.params.id;
        conditions['answers.' + i + '.comments._id'] = req.params.commentId;
        conditions['answers.' + i + '.comments.user'] = req.user._id;
        var doc = {};
        doc['answers.' + i + '.comments.$.content'] = req.body.content;
        /*jshint -W083 */
        Question.update(conditions, doc, function(err, num){
          if(err) { return handleError(res)(err); }
          if(num === 0) { return res.send(404).end(); }
          exports.show(req, res);
          return;
        });
      }
    }
    if(!found){
      return res.send(404).end();
    }
  });
}
クライアント側コントローラの変更
コメントの追加・削除・更新用の関数を用意しておき、コメントの追加・削除・更新要求をサーバ側に中継します。
client/app/questionsShow/questionsShow.controller.js
    $scope.newComment = {};
    $scope.submitComment = function() {
      $http.post('/api/questions/' + $stateParams.id + '/comments', $scope.newComment).success(function(){
        loadQuestions();
        $scope.newComment = {};
        $scope.editNewComment = false;
      });
    };
    $scope.submitAnswerComment = function(answer) {
      $http.post('/api/questions/' + $stateParams.id + '/answers/' + answer._id + '/comments', answer.newAnswerComment).success(function(){
        loadQuestions();
      });
    };
    $scope.deleteComment = function(comment) {
      $http.delete('/api/questions/' + $stateParams.id + '/comments/' + comment._id).success(function(){
        loadQuestions();
      });
    };
    $scope.deleteAnswerComment = function(answer, answerComment) {
      $http.delete('/api/questions/' + $stateParams.id + '/answers/' + answer._id + '/comments/' + answerComment._id).success(function(){
        loadQuestions();
      });
    };
    $scope.updateComment = function(comment) {
      $http.put('/api/questions/' + $stateParams.id + '/comments/' + comment._id, comment).success(function(){
        loadQuestions();
      });
    };
    $scope.updateAnswerComment = function(answer, answerComment) {
      $http.put('/api/questions/' + $stateParams.id + '/answers/' + answer._id + '/comments/' + answerComment._id, answerComment).success(function(){
        loadQuestions();
      });
    };
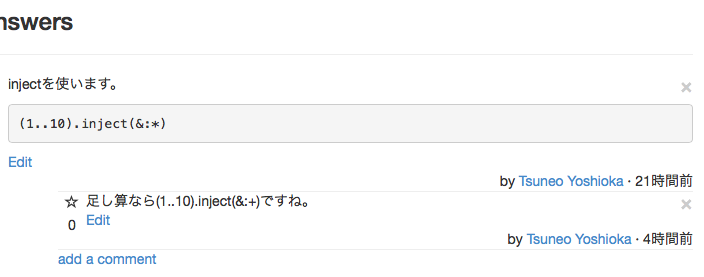
クライアント側質問表示HTMLの変更
質問オブジェクトに含まれる、質問コメント、回答コメントの内容・作成日時・ユーザを表示するようします。また、新しいコメントを追加できるように入力欄を追加します。
client/app/questionsShow/questionsShow.html
<div class="text-right">by <a ng-href="/users/{{question.user._id}}">{{question.user.name}}</a> · {{question.createdAt|fromNow}}</div> <div class="comment"> <div ng-repeat="comment in question.comments"> <hr/> <button ng-if="isOwner(comment)" type="button" class="close" ng-click="deleteComment(comment)">×</button> <pagedown-viewer content="comment.content" ng-if="!editting"></pagedown-viewer> <pagedown-editor ng-model="comment.content" ng-if=" editting"></pagedown-editor> <button type="submit" class="btn btn-primary" ng-click="editting=false;updateComment(comment)" ng-show=" editting">Save</button> <a ng-click="editting=!editting;" ng-show="isOwner(comment) && !editting">Edit</a> <div class="text-right" style="vertical-align: bottom;">by <a ng-href="/users/{{comment.user._id}}">{{comment.user.name}}</a> · {{comment.createdAt|fromNow}}</div> <div class="clearfix"></div> </div> <hr/> <a ng-click="editNewComment=!editNewComment;">add a comment</a> <form ng-if="editNewComment" name="commentForm"> <pagedown-editor ng-model="newComment.content" editor-class="'comment-wmd-input'" name="commentEditor" required> </pagedown-editor> <button type="button" class="btn btn-primary" ng-click="submitComment()" ng-disabled="commentForm.$invalid">Add Comment</button> </form> </div> ... <h3>{{question.answers.length}} Answers</h3> <div ng-repeat="answer in question.answers"> ... <div class="text-right">by {{answer.user.name}} · {{answer.createdAt|fromNow}}</div> <div class="comment"> <div ng-repeat="comment in answer.comments"> <hr/> <button ng-if="isOwner(comment)" type="button" class="close" ng-click="deleteAnswerComment(answer, comment)">×</button> <pagedown-viewer content="comment.content" ng-if="!editting"></pagedown-viewer> <pagedown-editor ng-model="comment.content" ng-if=" editting"></pagedown-editor> <button type="submit" class="btn btn-primary" ng-click="editting=false;updateAnswerComment(answer, comment)" ng-show=" editting">Save</button> <a ng-click="editting=!editting;" ng-show="isOwner(comment) && !editting">Edit</a> <div class="text-right">by <a ng-href="/users/{{question.user._id}}">{{comment.user.name}}</a> · {{comment.createdAt|fromNow}}</div> <div class="clearfix"></div> </div> <hr/> <a ng-click="editNewAnswerComment=!editNewAnswerComment;answer.newAnswerComment={}">add a comment</a> <form ng-if="editNewAnswerComment" name="answer_{{answer.id}}_comment"> <hr/> <pagedown-editor ng-model="answer.newAnswerComment.content" editor-class="'comment-wmd-input'" required> </pagedown-editor> <button type="button" class="btn btn-primary" ng-click="submitAnswerComment(answer)" ng-disabled="answer_{{answer.id}}_comment.$invalid">Add Comment</button> </form> </div> </div> <hr/> <h3>Your answer</h3> ...
client/app/questionsShow/questionsShow.scss
.comment-wmd-input {
  height: 50px;
  width: 100%;
  background-color: Gainsboro;
  border: 1px solid DarkGray;
};
お気に入りの追加
質問、質問コメント、回答、回答コメントに対してお気に入りできるようにします。

サーバ側DBモデルの変更
質問、質問コメント、回答、回答コメントについて、お気に入りユーザ一覧を質問ドキュメントのstarsフィールドに配列として保持しておきます。
server/api/question/question.model.js
var QuestionSchema = new mongoose.Schema({
  ...
  answers: [{
    ...
    comments: [{
      ...
      stars: [{
        type: mongoose.Schema.ObjectId,
        ref: 'User'
      }],
      ...
    }],
    stars: [{
      type: mongoose.Schema.ObjectId,
      ref: 'User'
    }],
    ...
  }],
  ...
  comments: [{
    ...
    stars: [{
      type: mongoose.Schema.ObjectId,
      ref: 'User'
    }],
    ...
  }],
  stars: [{
    type: mongoose.Schema.ObjectId,
    ref: 'User'
  }],
  ...
});
サーバ側ルーティングの追加
質問、質問コメント、回答、回答コメントに対してお気に入りの登録・削除用に以下のようなAPIを追加します。
| メソッド | URL | 動作 |
|---|---|---|
| POST | /:id/star | 質問のお気に入り登録 |
| DELETE | /:id/star | 質問のお気に入り削除 |
| POST | /:id/answers/:answerId/star | 回答のお気に入り登録 |
| DELETE | /:id/answers/:answerId/unstar | 回答のお気に入り削除 |
| POST | /:id/comments/:commentId/star | 質問コメントのお気に入り登録 |
| DELETE | /:id/comments/:commentId/unstar | 質問コメントのお気に入り削除 |
| POST | /:id/answers/:answerId/comments/:commentId/star | 回答コメントのお気に入り登録 |
| DELETE | /:id/answers/:answerId/comments/:commentId/star | 回答コメントのお気に入り削除 |
全てユーザに関する操作ですので、auth.isAuthenticated()を呼び出して認証機能を有効にしておきます。
server/api/question/index.js
router.put('/:id/star', auth.isAuthenticated(), controller.star);
router.delete('/:id/star', auth.isAuthenticated(), controller.unstar);
router.put('/:id/answers/:answerId/star', auth.isAuthenticated(), controller.starAnswer);
router.delete('/:id/answers/:answerId/star', auth.isAuthenticated(), controller.unstarAnswer);
router.put('/:id/comments/:commentId/star', auth.isAuthenticated(), controller.starComment);
router.delete('/:id/comments/:commentId/star', auth.isAuthenticated(), controller.unstarComment);
router.put('/:id/answers/:answerId/comments/:commentId/star', auth.isAuthenticated(), controller.starAnswerComment);
router.delete('/:id/answers/:answerId/comments/:commentId/star', auth.isAuthenticated(), controller.unstarAnswerComment);
サーバ側DBモデルの変更
DBモデルで、質問、質問コメント、回答、回答コメントについて、お気に入りユーザを配列で保持します。配列配下のオブジェクトについては、"$"で配列中の位置を参照できます。 回答配列の下のコメント配列の下のお気に入りユーザ一覧をupdate()で更新する場合、複数の"$"を使うことができませんので、配列を明示的に走査します。
server/api/question/question.controller.js
/* star/unstar question */
export function star(req, res) {
  Question.update({_id: req.params.id}, {$push: {stars: req.user.id}}, function(err, num){
    if(err) { return handleError(res)(err); }
    if(num === 0) { return res.send(404).end(); }
    exports.show(req, res);
  });
}
export function unstar(req, res) {
  Question.update({_id: req.params.id}, {$pull: {stars: req.user.id}}, function(err, num){
    if(err) { return handleError(res, err); }
    if(num === 0) { return res.send(404).end(); }
    exports.show(req, res);
  });
}

/* star/unstar answer */
export function starAnswer(req, res) {
  Question.update({_id: req.params.id, 'answers._id': req.params.answerId}, {$push: {'answers.$.stars': req.user.id}}, function(err, num){
    if(err) { return handleError(res)(err); }
    if(num === 0) { return res.send(404).end(); }
    exports.show(req, res);
  });
}
export function unstarAnswer(req, res) {
  Question.update({_id: req.params.id, 'answers._id': req.params.answerId}, {$pull: {'answers.$.stars': req.user.id}}, function(err, num){
    if(err) { return handleError(res)(err); }
    if(num === 0) { return res.send(404).end(); }
    exports.show(req, res);
  });
}

/* star/unstar question comment */
export function starComment(req, res) {
  Question.update({_id: req.params.id, 'comments._id': req.params.commentId}, {$push: {'comments.$.stars': req.user.id}}, function(err, num){
    if(err) { return handleError(res)(err); }
    if(num === 0) { return res.send(404).end(); }
    exports.show(req, res);
  });
}
export function unstarComment(req, res) {
  Question.update({_id: req.params.id, 'comments._id': req.params.commentId}, {$pull: {'comments.$.stars': req.user.id}}, function(err, num){
    if(err) { return handleError(res)(err); }
    if(num === 0) { return res.send(404).end(); }
    exports.show(req, res);
  });
}

/* star/unstar question answer comment */
var pushOrPullStarAnswerComment = function(op, req, res) {
  Question.find({_id: req.params.id}).exec(function(err, questions){
    if(err) { return handleError(res)(err); }
    if(questions.length === 0) { return res.send(404).end(); }
    var question = questions[0];
    var found = false;
    for(var i=0; i < question.answers.length; i++){
      if(question.answers[i]._id.toString() === req.params.answerId){
        found = true;
        var conditions = {};
        conditions._id = req.params.id;
        conditions['answers.' + i + '.comments._id'] = req.params.commentId;
        var doc = {};
        doc[op] = {};
        doc[op]['answers.' + i + '.comments.$.stars'] = req.user.id;
        // Question.update({_id: req.params.id, 'answers.' + i + '.comments._id': req.params.commentId}, {op: {('answers.' + i + '.comments.$.stars'): req.user.id}}, function(err, num){
        /*jshint -W083 */
        Question.update(conditions, doc, function(err, num){
          if(err) { return handleError(res)(err); }
          if(num === 0) { return res.send(404).end(); }
          exports.show(req, res);
          return;
        });
      }
    }
    if(!found){
      return res.send(404).end();
    }
  });
};
export function starAnswerComment(req, res) {
  pushOrPullStarAnswerComment('$push', req, res);
}
export function unstarAnswerComment(req, res) {
  pushOrPullStarAnswerComment('$pull', req, res);
}
クライアント側質問表示コントローラの変更
質問、質問コメント、回答、回答コメントのお気に入りの確認・追加・削除用に関数を追加します。APIの部分パスを引数にとることで質問・質問コメント・回答・回答コメント用に分けずに共通の関数にしています。
client/app/questionsShow/questionsShow.controller.js
    $scope.isStar = function(obj){
      return Auth.isLoggedIn() && obj && obj.stars && obj.stars.indexOf(Auth.getCurrentUser()._id)!==-1;
    };
    $scope.star = function(subpath) {
      $http.put('/api/questions/' + $scope.question._id + subpath + '/star').success(function(){
        loadQuestions();
      });
    };
    $scope.unstar = function(subpath) {
      $http.delete('/api/questions/' + $scope.question._id + subpath + '/star').success(function(){
        loadQuestions();
      });
    };
クライアント側質問表示HTMLの変更
現在の、お気に入り状態を星アイコンで表示します。また、クリックすることでお気に入りの有効・無効を切り替えます。
client/app/questionsShow/questionsShow.html
    <div style="float: left;font-size: x-large; padding: 0; width: 2em; text-align: center;">
      <button ng-if=" isStar(question)" type="button" style="background: transparent; border: 0;" ng-click="unstar('')">
        <span class="glyphicon glyphicon-star" style="color: #CF7C00;" ></span>
      </button>
      <button ng-if="!isStar(question)" type="button" style="background: transparent; border: 0;" ng-click="star('')"  >
        <span class="glyphicon glyphicon-star-empty"></span>
      </button>
      <br/>
      <div>{{question.stars.length}}</div>
    </div>

    <div>
      <h1>
        <div ng-if="! editting">{{question.title}}</div>
client/app/questionsShow/questionsShow.html
      <div style="float: left;font-size: normal; padding: 0; width: 2em; text-align: center;">
        <button ng-if=" isStar(comment)" type="button" style="background: transparent; border: 0;" ng-click="unstar('/comments/' + comment._id)">
          <span class="glyphicon glyphicon-star" style="color: #CF7C00;" ></span>
        </button>
        <button ng-if="!isStar(comment)" type="button" style="background: transparent; border: 0;" ng-click="  star('/comments/' + comment._id)"  >
          <span class="glyphicon glyphicon-star-empty"></span>
        </button>
        <br/>
        <div>{{comment.stars.length}}</div>
      </div>

      <pagedown-viewer content="comment.content" ng-if="!editting"></pagedown-viewer>
client/app/questionsShow/questionsShow.html
    <div style="float: left;font-size: large; padding: 0; width: 2em; text-align: center;">
      <button ng-if=" isStar(answer)" type="button" style="background: transparent; border: 0;" ng-click="unstar('/answers/' + answer._id)">
        <span class="glyphicon glyphicon-star" style="color: #CF7C00;" ></span>
      </button>
      <button ng-if="!isStar(answer)" type="button" style="background: transparent; border: 0;" ng-click="  star('/answers/' + answer._id)"  >
        <span class="glyphicon glyphicon-star-empty"></span>
      </button>
      <br/>
      <div>{{answer.stars.length}}</div>
    </div>

    <div class="answer">
        <div style="float: left;font-size: normal; padding: 0; width: 2em; text-align: center;">
          <button ng-if=" isStar(comment)" type="button" style="background: transparent; border: 0;" ng-click="unstar('/answers/' + answer._id + '/comments/' + comment._id)">
            <span class="glyphicon glyphicon-star" style="color: #CF7C00;" ></span>
          </button>
          <button ng-if="!isStar(comment)" type="button" style="background: transparent; border: 0;" ng-click="  star('/answers/' + answer._id + '/comments/' + comment._id)"  >
            <span class="glyphicon glyphicon-star-empty"></span>
          </button>
          <br/>
          <div>{{comment.stars.length}}</div>
        </div>

        <pagedown-viewer content="comment.content" ng-if="!editting"></pagedown-viewer>
クライアント側質問一覧コントローラの変更
質問一覧でもお気に入り情報を表示できるように、isStar()関数を追加します。
client/app/questionsIndex/questionsIndex.controller.js
  .controller('QuestionsIndexCtrl', function ($scope, $http, Auth, $location) {
    ...
    $scope.isStar = function(obj){
      return Auth.isLoggedIn() && obj && obj.stars && obj.stars.indexOf(Auth.getCurrentUser()._id)!==-1;
    };
クライアント側質問一覧HTMLの変更
質問一覧で、お気に入りの数と、回答の数を表示するようにします。
client/app/questionsIndex/questionsIndex.html
<table class="table table-striped"> <thead> <tr> <th width="20">Stars</th> <th width="20">Answers</th> <th>Question</th> </tr> </thead> <tbody> <tr ng-repeat="question in questions"> <td style="text-align: center; vertical-align:middle"> <div style="font-size: xx-large;">{{question.stars.length}}</div> </td> <td style="text-align: center; vertical-align:middle"> <div style="font-size: xx-large;">{{question.answers.length}}</div> </td> <td> <div style="float: right;"> <span ng-if=" isStar(question)" class="glyphicon glyphicon-star" style="color: #CF7C00;" ></span> <span ng-if="!isStar(question)" class="glyphicon glyphicon-star-empty"></span> </div> <a ng-href="/questions/show/{{question._id}}" style="font-size: large">{{question.title}}</a> <div class="clearfix"></div> <div style="float: right;"> by <a ng-href="/users/{{question.user._id}}">{{question.user.name}}</a> · {{question.createdAt|fromNow}} </div> <div> <span ng-repeat="tag in question.tags"> <span class="label label-info"> {{tag.text}} </span> </span> </div> <div class="clearfix"></div> </td> </tr> </tbody> </table>
全ての質問、自分の質問、お気に入りの質問の一覧表示
現状、すべての質問が一覧には表示されますが、全ての質問以外に、自分の質問、お気に入りの質問一覧も表示できるようにしてみます。

クライアント側ルーティングの変更
全ての質問、自分の質問、お気に入りの質問それぞれの一覧表示にURLを対応させます。
| URL | 動作 |
|---|---|
| / | 全ての質問一覧 |
| /users/:userId | 自分のお気に入り一覧 |
| /users/:userId/starred | お気に入りの質問一覧 |
それぞれのルーティングでは同じコントローラ、テンプレートを利用するようにしてquery変数で検索条件を変えます。自分の質問一覧表示では、質問のユーザIDに自分が含まれているかを確認します。お気に入り一覧表示では、質問、質問コメント、回答、回答コメントのいずれかのお気に入りユーザにログインユーザが含まれているか確認します。
client/app/questionsIndex/questionsIndex.js
...
  .config(function ($stateProvider) {
    $stateProvider
      .state('main', {
        url: '/',
        templateUrl: 'app/questionsIndex/questionsIndex.html',
        controller: 'QuestionsIndexCtrl',
        resolve: {
          query: function(){return {};}
        },
      })
      .state('starredQuestionsIndex', {
        url: '/users/:userId/starred',
        templateUrl: 'app/questionsIndex/questionsIndex.html',
        controller: 'QuestionsIndexCtrl',
        resolve: {
          query: function($stateParams){
            return {
              $or: [
                {'stars': $stateParams.userId},
                {'answers.stars': $stateParams.userId},
                {'comments.stars': $stateParams.userId},
                {'answers.comments.stars': $stateParams.userId},
              ]
            };
          }
        },
      })
      .state('userQuestionsIndex', {
        url: '/users/:userId',
        templateUrl: 'app/questionsIndex/questionsIndex.html',
        controller: 'QuestionsIndexCtrl',
        resolve: {
          query: function($stateParams){
            return {user: $stateParams.userId};
          }
        },
      });

  });
クライアント側質問一覧コントローラの変更
ルーティングで設定したqueryをサーバに渡します。
client/app/questionsIndex/questionsIndex.controller.js
  .controller('QuestionsIndexCtrl', function ($scope, $http, Auth, query) {
    $http.get('/api/questions', {params: {query: query}}).success(function(questions) {
クライアント側質問一覧コントローラのテストの変更
テストコードに空のqueryを追加してエラーが起こらないようにします。
client/app/questionsIndex/questionsIndex.controller.spec.js
    QuestionsIndexCtrl = $controller('QuestionsIndexCtrl', {
      $scope: scope,
      query: {},
    });
サーバ側コントローラの変更
受け取ったqueryを用いてDBに問い合わせます。
server/api/question/question.controller.js
export function index(req, res) {
  var query = req.query.query && JSON.parse(req.query.query);
  Question.find(query).sort(...
クライアント側Navbarコントローラの変更
Navbarに、全ての質問一覧、自分の質問一覧、お気に入りの一覧表示用のリンクを設定します。URLと表示の有効・無効はログイン前後で変える必要があるので、これらはメニュー項目で関数としておきます。
client/components/navbar/navbar.controller.js
  constructor(Auth) {
    this.menu = [
      {
        'title': 'All',
        'link': function(){return '/';},
        'show': function(){return true;},
      },
      {
        'title': 'Mine',
        'link': function(){return '/users/' + Auth.getCurrentUser()._id;},
        'show': Auth.isLoggedIn,
      },
      {
        'title': 'Starred',
        'link': function(){return '/users/' + Auth.getCurrentUser()._id + '/starred';},
        'show': Auth.isLoggedIn,
      },
    ];
    ...
クライアント側Navbar HTMLの変更
リンク先のURLを$scope.item.link()で取得します。また、$scope.item.show()が有効の時のみリンクを表示するようにします。
client/components/navbar/navbar.html
      <ul class="nav navbar-nav">
        <li ng-repeat="item in nav.menu" ng-class="{active: isActive(item.link())}" ng-show="item.show()">
            <a ng-href="{{item.link()}}">{{item.title}}</a>
        </li>
      </ul>
検索
MongoDBの全文検索機能を使って、質問タイトル・質問内容・質問コメント・回答・回答コメントから検索できるようにしてみます。

クライアント側Navbar HTMLの変更
Navbarに検索ボックスを追加します。検索実行時はsearch()関数を呼びます。
client/components/navbar/navbar.html
      <form class="navbar-form navbar-left" role="search" ng-submit="nav.search(keyword)">
        <div class="input-group">
          <input type="text" class="form-control" placeholder="Search" ng-model="keyword">
          <span class="input-group-btn">
            <button type="submit" class="btn btn-default">
              <span class="glyphicon glyphicon-search">
              </span>
            </button>
          </span>
        </div>
      </form>
      <ul class="nav navbar-nav navbar-right">
クライアント側Navbarコントローラの変更
client/components/navbar/navbar.controller.js
  constructor(Auth, $state) {
    this.search = function(keyword) {
      $state.go('main', {keyword: keyword}, {reload: true});
    };
    ...
サーバ側DBモデルの変更
タイトル・質問内容・質問コメント・回答・回答コメントに全文検索用のインデックスを設定するため、QuestionSchema.index()で、検索対象フィールドに'text'を設定します。 なお、MongoDBは自動的にインデックス名を追加しますが、128文字を越えると正しく動作しなくなりますので、明示的に指定しておきます。(参照:We need to specify name explicitly for long schema.)
server/api/question/question.model.js
QuestionSchema.index({
  'title': 'text',
  'content': 'text',
  'tags.text': 'text',
  'answers.content': 'text',
  'comments.content': 'text',
  'answers.comments.content': 'text',
}, {name: 'question_schema_index'});
クライアント側質問表示ルーティングの変更
検索キーワードをURLのkeywordパラメータとして受け取れるように、ルーティング情報のurlに"/?keyword"として設定します。
client/app/questionsIndex/questionsIndex.js
      .state('main', {
        url: '/?keyword',
        ...
クライアント側質問表示コントローラの変更
MongoDBの'$text'と、'$search'オペレータを使い、keywordパラメータで検索を行うようにクエリを設定します。
client/app/questionsIndex/questionsIndex.controller.js
  .controller('QuestionsIndexCtrl', function ($scope, $http, $location, Auth, query) {
    ...
    var keyword = $location.search().keyword;
    if(keyword){
      query = _.merge(query, {$text: {$search: keyword}});
    }
    $http.get('/api/questions',...
日本語検索
MongoDBの全文検索は、日本語検索に対応していません。日本語検索を行えるように、TinySegmenterで分かち書きを行ってみます。

TinySegmenterをインストール
TinySegmenterをサーバ側ライブラリとしてインストールします。
% npm install --save r7kamura/tiny-segmenter
サーバ側DBモデルで、分かち書き結果を保存するフィールドをsearchTextとして作成します。
server/api/question/question.model.js
var QuestionSchema = new mongoose.Schema({
  ...
  searchText: String,
});
インデックスにsearchTextフィールドを追加します。
server/api/question/question.model.js
QuestionSchema.index({
  ...
  'searchText': 'text',
}, {name: 'question_schema_index'});
分かち書きを行う関数を追加し、pre('save')を使って保存前に呼び出します。また質問モデルの静的関数でインデックスを更新できるように、"QuestionSchema.statics"上に関数を追加しておきます。
server/api/question/question.model.js
var TinySegmenter = require('tiny-segmenter');

var getSearchText = function(question){
  var tinySegmenter = new TinySegmenter();
  var searchText = "";
  searchText += tinySegmenter.segment(question.title).join(' ') + " ";
  searchText += tinySegmenter.segment(question.content).join(' ') + " ";
  question.answers.forEach(function(answer){
    searchText += tinySegmenter.segment(answer.content).join(' ') + " ";
    answer.comments.forEach(function(comment){
      searchText += tinySegmenter.segment(comment.content).join(' ') + " ";
    });
  });
  question.comments.forEach(function(comment){
    searchText += tinySegmenter.segment(comment.content).join(' ') + " ";
  });
  console.log("searchText", searchText);
  return searchText;
};
QuestionSchema.statics.updateSearchText = function(id, cb){
  this.findOne({_id: id}).exec(function(err, question){
    if(err){ if(cb){cb(err);} return; }
    var searchText = getSearchText(question);
    this.update({_id: id}, {searchText: searchText}, function(err, num){
      if(cb){cb(err);}
    });
  }.bind(this));
};

QuestionSchema.pre('save', function(next){
  this.searchText = getSearchText(this);
  next();
});
pre('save')はupdate()での更新時は呼び出されませんので、サーバ側コントローラでupdate関数での更新後にupdateSearchText()関数を呼び出して、明示的に分かち書きと全文検索用のインデックスの更新を行います。
server/api/question/question.controller.js
export function createAnswer(req, res) {
    ...
    exports.show(req, res);
    Question.updateSearchText(req.params.id);
  });
};
export function destroyAnswer(req, res) {
  ...
    exports.show(req, res);
    Question.updateSearchText(req.params.id);
  });
};
export function updateAnswer(req, res) {
    ...
    exports.show(req, res);
    Question.updateSearchText(req.params.id);
  });
};
...
/* comments APIs */
export function createComment(req, res) {
    ...
    exports.show(req, res);
    Question.updateSearchText(req.params.id);
  })
};
export function destroyComment(req, res) {
    ...
    exports.show(req, res);
    Question.updateSearchText(req.params.id);
  });
};
export function updateComment(req, res) {
    ...
    exports.show(req, res);
    Question.updateSearchText(req.params.id);
  });
};
...
/* answersComments APIs */
export function createAnswerComment(req, res) {
    ...
    exports.show(req, res);
    Question.updateSearchText(req.params.id);
  })
};
export function destroyAnswerComment(req, res) {
    ...
    exports.show(req, res);
    Question.updateSearchText(req.params.id);
  });
};
export function updateAnswerComment(req, res) {
  ...
          exports.show(req, res);
          Question.updateSearchText(req.params.id);
  ...
};
インデックスを作り直すためquestionsコレクションを一度削除して、サーバ(grunt serve)を再起動します。
% mongo
> use paizaqa-dev
> db.questions.drop()
% grunt serve
無限スクロール
現状、最新20件の質問しか表示することができていませんので、無限スクロールで過去の質問も表示できるようにしてみます。
クライアント側ライブラリngInfiniteScrollのインストール
無限スクロール用のライブラリngInfiniteScrollをインストールします。
% bower install --save ngInfiniteScroll
アプリケーションの依存モジュール追加
ngInfiniteScrollをアプリケーションの依存モジュールに追加して利用できるようにします。
client/app/app.js
angular.module('paizaqaApp', [
  ...
  'infinite-scroll',
 ])
クライアント側質問一覧コントローラの変更
スクロール時に過去の質問を追加表示できるように、nextPage関数を実装します。最後の質問IDより古いIDの質問を返すように、クエリで"{_id: {$lt: lastID}}"と条件を指定します。読み込み中状態を$scope.busyで、質問がまだあるかを$scope.noMoreDataに保持します。
client/app/questionsIndex/questionsIndex.controller.js
    $scope.busy = true;
    $scope.noMoreData = false;

    $http.get('/api/questions', {params: {query: query}}).success(function(questions) {
      $scope.questions = questions;
      if($scope.questions.length < 20){
        $scope.noMoreData = true;
      }
      $scope.busy = false;
    });
    ...
    $scope.nextPage = function(){
      if($scope.busy){ return; }
      $scope.busy = true;
      var lastId = $scope.questions[$scope.questions.length-1]._id;
      var pageQuery = _.merge(query, {_id: {$lt: lastId}});
      $http.get('/api/questions', {params: {query: pageQuery}}).success(function(questions){
        $scope.questions = $scope.questions.concat(questions);
        $scope.busy = false;
        if(questions.length === 0){
          $scope.noMoreData = true;
        }
      });
    };
クライアント側質問一覧HTMLの変更
一番下までスクロールしたら次の質問を読み込むように、infinite-scroll属性でnextPage()関数を呼び出します。また、読み込み中やすべてを読み込み済みの場合は無限スクロールを無効にします。読み込み中は"Loading data"と表示するようにしておきます。ng-show='busy'と指定することでbusyがtrueの場合のみ要素が表示されます。
client/app/questionsIndex/questionsIndex.html
<div class="container" infinite-scroll='nextPage()' infinite-scroll-disabled='busy || noMoreData'>
  ...
  <div ng-show='busy'>Loading data...</div>
</div>
SNS認証
SNS認証(Facebook, Twitter, Google)を利用する場合、APIキーとSECRETキーの登録を行います。登録手順は第一回の手順を参照ください。
デプロイ
それではHerokuにデプロイをします。デプロイ設定は"yo angular-fullstack:heroku"コマンドで行います。また、無料プランがあるMongoDBモジュールMongoLabもインストールしておきます。
% yo angular-fullstack:heroku
% cd dist
% heroku addons:add mongolab
次回以降のデプロイでは、"grunt"でビルドを行い、"grunt buildcontrol:heroku"でデプロイします。
% grunt
% grunt buildcontrol:heroku
デプロイできたら、http://アプリケーション名.herokuapp.com/ で動作確認をします。
正しく表示できていない場合、Herokuのログを確認します。
% cd dist
% heroku logs
MongoDBのデータについては、MongoHubなどのGUIツールで確認すると便利です。MongoDBのURLはHerokuから"heroku config"コマンドで取得します。
% heroku config
...
MONGOLAB_URI: mongodb://ユーザ名:パスワード@ホスト名:ポート番号/データベース名
...
まとめ
MEANスタックAngularJS Full-Stack generatorを用いてQAサイトを作成する手順を紹介しました。MEANスタックを使えば、JavaScriptのみでサーバからクライアントまで、見通しの良いサービスを簡単に作ることができます。ジェネレータを使うことで雛形となるコードを自動生成ができますので、変更を加えていくだけでサービスが作れるようになります。特に、スタートアップやプロトタイプで短時間・少ない人数で試行錯誤しながらサービスを作り上げる時には非常に便利です。
ぜひアイデアを生かして、ウェブサービスを作ってみてはいかがでしょうか?
手順通りに動作しないなど、気づいた点がありましたら、コメント等でフィードバックいただけるとうれしいです。
今後ともMEANスタックを使ったたのWebサービスの作り方も紹介していきたいと思います。
MEANスタック開発記事一覧 |
|
| 最新・最速!Webサービスが今すぐ作れる! - MEANスタック開発(1) | |
| 初級者でも1時間でTwitter風Webサービスを作れる!- MEANスタック開発(2) | |
| → | Webサービスを作りたい人に最適、たった1時間でJSベースのQAサイトを作る方法 - MEANスタック開発(3) |
paizaは、技術を追い続けることが仕事につながり、スキルのある人がきちんと評価される場を作ることで、日本のITエンジニアの地位向上を目指したいと考えています。
自分のスキルを磨いていきたいと考えている方におすすめなのが「paizaラーニング」。オンラインでプログラミングしながらスキルアップできる入門学習コンテンツです。初心者でも楽しくプログラミングの基本を学ぶことができます。

そして、paizaでは、Webサービス開発企業などで求められるコーディング力や、テストケースを想定する力などが問われるプログラミングスキルチェック問題も提供しています。

スキルチェックに挑戦した人は、その結果によってS・A・B・C・D・Eの6段階のランクを取得できます。必要なスキルランクを取得すれば、書類選考なしで企業の求人に応募することも可能です。「自分のプログラミングスキルを客観的に知りたい」「スキルを使って転職したい」という方は、ぜひチャレンジしてみてください。

